Shower Enclosure Design Tips
Please discuss these guidelines with your contractor in the early stages of development to ensure trouble free installation of your frameless enclosure. By doing this you can avoid many of the common installation problems before they occur. This will ensure that the focus is on the safety, integrity, function and beauty of your new enclosure:
1. BACKING REQUIREMENTS
Studs should be doubled up behind wall on hinge side of door where the door will hinge above threshold of the shower pan, and should run to the full height of the shower unit. The studs should be laid flat on the wide side to allow a wider surface for mounting hardware and for structural support. Curbs should meet the walls at 90 degree angle.
2. PITCH OF CURBS FLOORS & SEATS
Leaks and standing water are caused by improperly pitched surfaces. All floors, curbs and seats should be pitched away from glass towards drain to eliminate leaks or standing water. A pitch at least 1/4” – 3/8” on bench seats and 3/16” – 1/4” on curbs and floors is ideal to eliminate leaks or standing water.
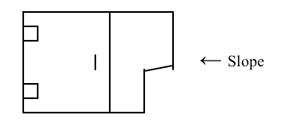
3. CURB & BUTTRESS INTERFACES
Always create 90 degree angles to curb buttress faces. This will ensure proper door swing clearances and avoid binding of hinges. Curbs should meet walls at 90 degree angle.

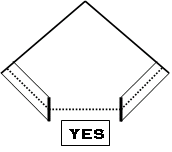
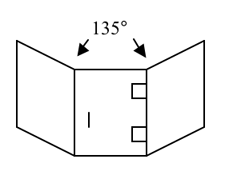
4. NEO-ANGLE CONFIGURATIONS
Glass is measured centerline on the curb. A standard neo-angled configuration uses 135 degree angles. The neo-angle shower door hardware from the manufacturer is based on 135 degree angles. The hardware can only be modified within a couple of degrees or it can destroy the integrity, clear coat and/or finish. Any other angle is considered custom. Keeping with the standard angles may avoid additional cost and complexity.
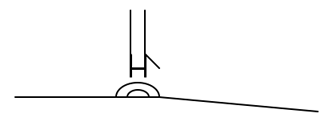
5. STEP-DOWN or CURBLESS SHOWERS
Pitch floor downward away from door inside the shower. Curbless designs should have a metal threshold for proper bottom sweep function and seal.
6. DOOR & PANEL SIZE RESTRICTIONS
Minimum Door width/opening is 24″ tile to tile.
No panel should be narrower than 4”. Code requires all shower glass to be Safety glass; either tempered or laminated (we do not recommend laminated glass). Panels narrower than 4″ may not be tempered, so keep this restriction in mind when designing your shower. Additional restrictions apply if hinging the door off a stationary panel. The minimum size panel when hinging the door off a panel is 6”.
7. GLASS/PORCELAIN TILES
Glass or porcelain tiles are extremely brittle and prone to break or chip when drilled into or when pressure is applied. If possible, do not use either of these in areas that require drilling to mount hardware Find a tile or marble that complements the glass tiles as a preferred alternate. There is no guarantee against breakage when glass tile are used during install or in the future.
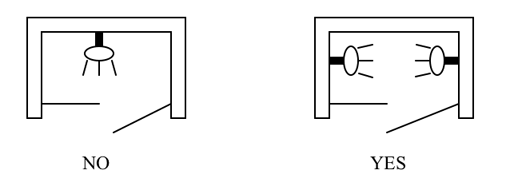
8. BODY SPRAYS
Proper placement of shower heads and body sprays is critical to ensure against leaking. Aim shower sprays away from the glass enclosure and toward tiled walls. There is no guarantee against leakage with any type of body sprays.
9. STEAM SHOWERS AND OVERSIZED ENCLOSURES
Door heights which exceed 84″ will typically require a transom or we suggest that you build down a soffit. In doing so make sure that it is perfectly plumb and square down to the curb footprint. In addition, interior ceiling should be sloped to allow condensation to run off rather than ‘drip’.
10. DOOR SWING
To provide a leakage warranty all swinging shower enclosure doors must be a primary outswing door. With an “L” vinyl seal applied to the stationary panel or wall the door will not swing inward. With applying the vinyl seal it allows Bath Concepts to provide you with a leakage warranty.
11. DECORATIVE BORDERS
The tile and surface area where the shower glass is to be installed should be clear of all protruding and decorative borders. Ideally any decorative borders running thru the shower glass area should be installed flush with the field tile. If the decorative border protrudes into the area that the shower glass will be set on the decorative boarder will need to be notched to accept the glass on the stationary panel(s) and on the door a flat field tile will need to be placed directly behind the centerline of where the glass is to be set. It is best to end the detailed pattern prior to where the shower glass will be installed. The shower glass is generally set to center on the curb.
12. DOOR SIZE AND WEIGHTS
Standard door width is between 26”-28”. Increasing door height will result in a decrease in door width or require an upgrade to heavier duty hinges. The manufacturer of the standard hinges has a width not to exceed 32” and the weight of the standard hinges not to exceed 80lbs. The heavier duty hinges have a maximum width not to exceed 36” and the weight of the heavier duty hinges not to exceed 110 lbs.
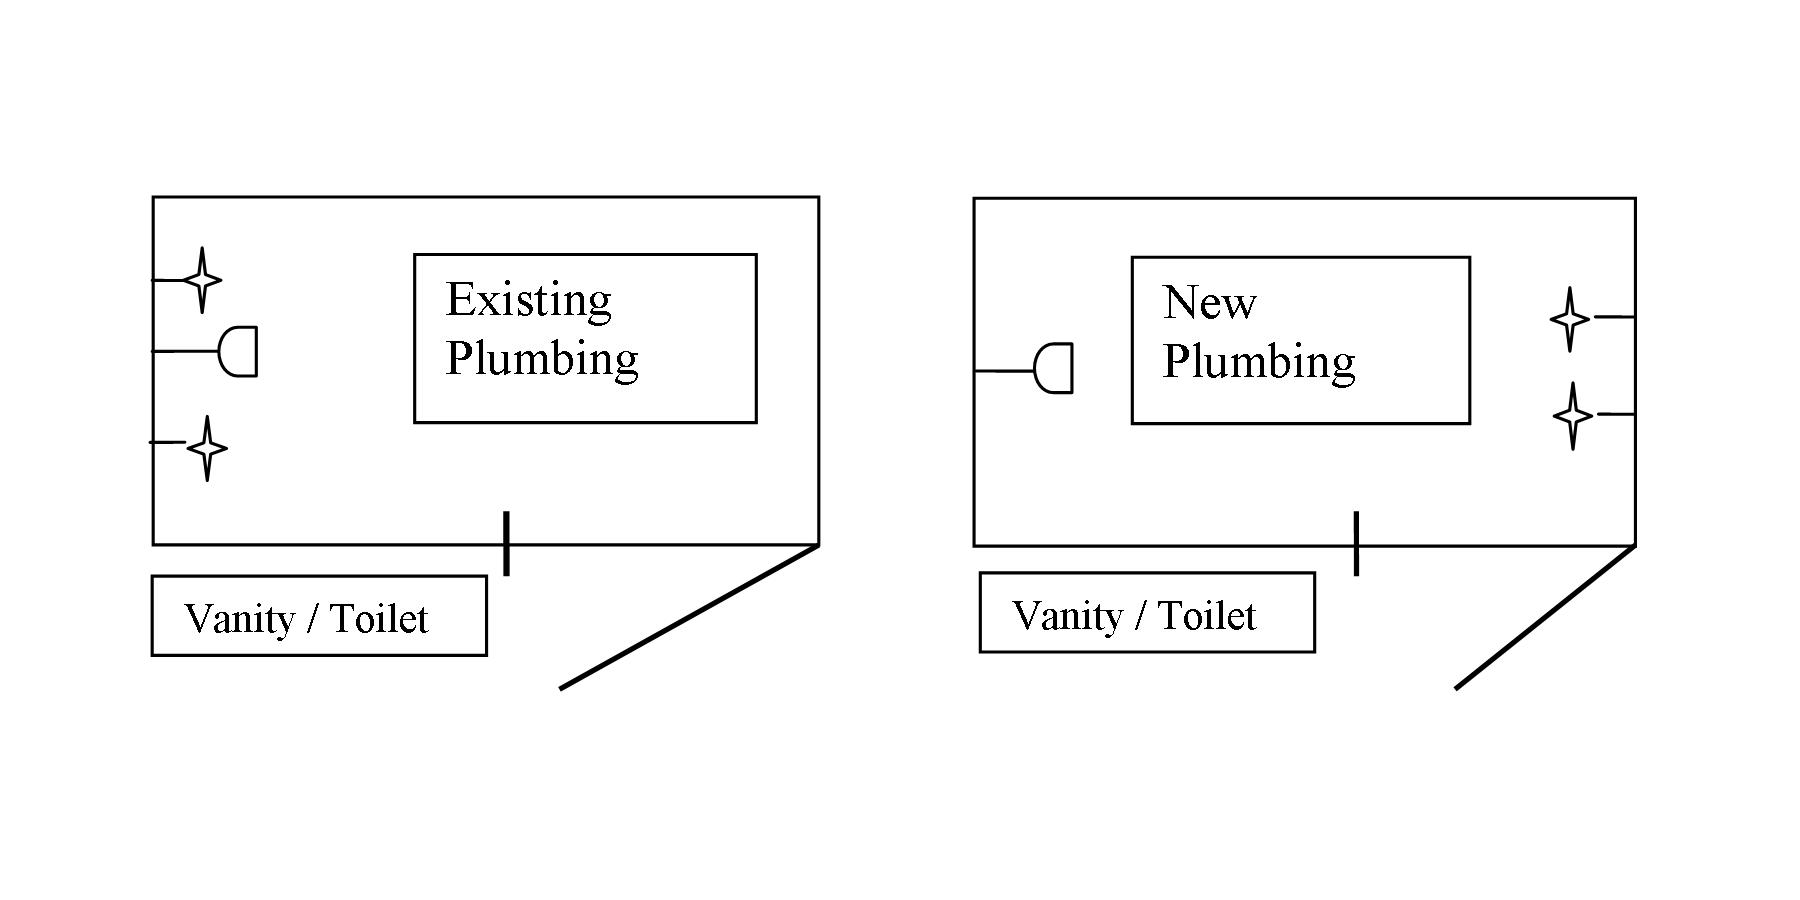
13. MOVE SHOWER VALVES (HANDLES) TO DOOR HINGE SIDE
In some bathrooms the shower head and valve(s) (handle(s)) are located on the same side as your toilet or vanity. When doing a pivoting door the most comfortable way to turn on the water is to open the door reach in and turn the valve(s) (handle(s)). Due to the toilet/vanity being on the same side outside the shower you would then have to reach around the stationary panel to access the valve(s) (handle(s)). Moving your shower valve(s) (handle(s)) from the same side as the shower head to the opposite side will allow you to comfortably reach in and turn on the water, also without being sprayed with cold water.
14. CLEAR PATH FOR PROPER DOOR SWING
Take into account placement of toilets, towel bars, and vanities because they can restrict door openings and sometimes not allow you to open the door a full 90 degrees. In most cases when putting a towel bar/ handle combo on the door with the towel bar on the outside, this will not allow the door to open a full 90 degrees if there is a wall that protrudes out past the pan. The towel bar will hit the wall and stop the door from swinging a full 90 degrees.
15. OVERHANGS
Any overhangs protruding into the shower area will need to be notched by the person that installed the surface to allow the glass to be pushed flush against lower surface and be sealed properly. The bath Concepts measuring technician will tape off and mark the area to be notched at the time of measure. Cutting glass around overhang creates problems with gaps, possible leakage and excessive silicone to seal for leakage.

16. GLASS PROTECTION
We highly recommend protecting your glass with a sealant. Glass is a porous material and overtime can collect a buildup of minerals from your soap and water. The glass protector makes cleaning and maintaining the shower a much more simple process than unprotected glass. Squeegee or towel drying the shower is still required to maintain spot free glass.